General Covering a laser balsa kit plane

exctmt

New Member
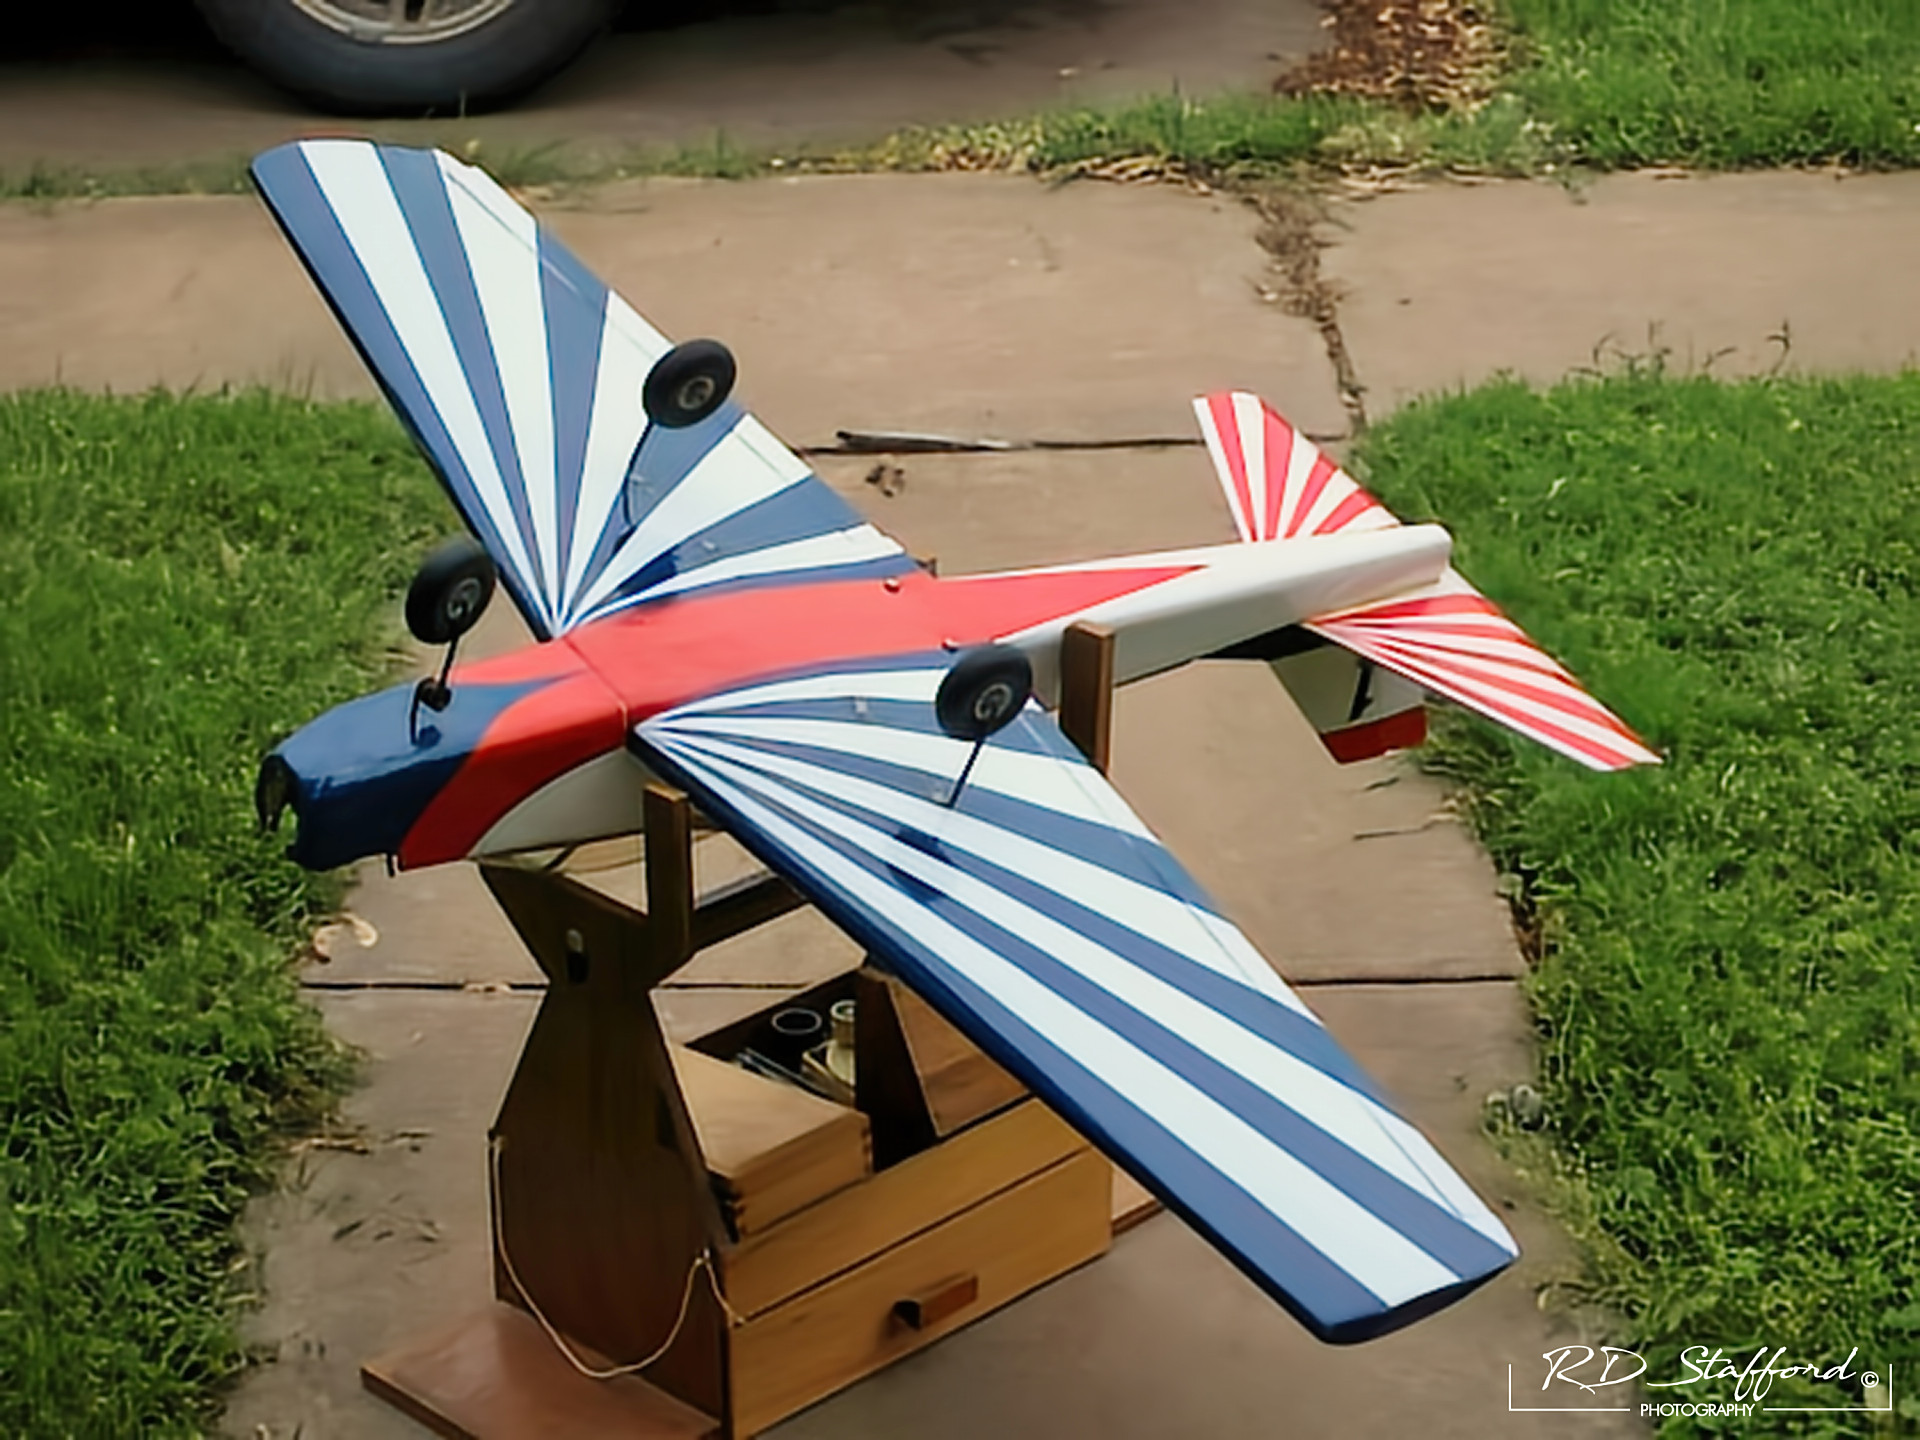
So, I am new to the hobby, but wanted to stay busy this winter until I can really put in some flite time.
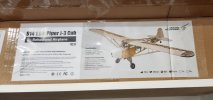
I built " Nitro fuel" race cars from the ground up in the past so I was pretty sure I could build one of these planes.......
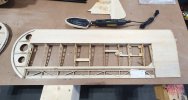
Huh, well I think building these planes is harder. Of course, I have never done it before, so I had A LOT to learn.
Well, I take my hat off to the seasoned builders out there.
My question:
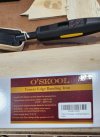
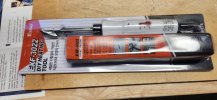
I am ready to start covering my plane and I think I have the right tools to do it.
However, I am hoping that someone who has the same irons as I do can give me some advice.
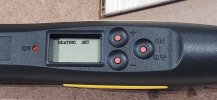
What is a good starting temperature to set the irons at?
I have watched several vides on You Tube, but none have really said what to start at, except not too hot.
Thanks in advance for any and all advice.
 

Attachments

  • #1.2.jpg
    #1.2.jpg
    157.6 KB · Views: 1
  • #2.1.jpg
    #2.1.jpg
    312.1 KB · Views: 1
  • #2.2.jpg
    #2.2.jpg
    263.7 KB · Views: 1
  • #2.3.jpg
    #2.3.jpg
    251.9 KB · Views: 1
  • #2.4.jpg
    #2.4.jpg
    227.3 KB · Views: 1
  • #2.5.jpg
    #2.5.jpg
    209.4 KB · Views: 1

RandyDSok

Well-Known Member
It has been ages since I scratch built or built from kits. So I'll try to remember the things I did as best as I can.

First, long before you reach the point of covering. Your surface, if not perfect... will show every flaw once you cover it. Covering will not hide anything you didn't prep properly. It's much like painting only you are using a plastic sheet instead. So fill all cracks and sand everything to a perfectly smooth surface just as you would anything you were going to paint.

Next thing when you do start using an iron or heat gun... forget about the numbers except to get you started. Irons are not perfect, no matter what temps they may show they have ... and different brand films, for that matter same brand but different year makes will differ. Each brand will have what temps they recommend... so start there but get a scrap piece of balsa and film and test it yourself. Ignore the numbers on the iron... let the results guide you.

You will want to find two temps that work with the iron and film you are using. You want a tacking ( lower ) temp to start with and a temp that works well for shrinking ( higher ) the film. Using the sock with the iron will of course require a slightly higher temp... but it also helps keep you from scratching the film. Personally, I preferred to tack with an iron and use a heat gun to shrink with.

Plan out your covering with as few sheets as possible. You will tack all of the edges you are working with first before you move onto the shrinking of whatever piece you are working on.
For instance on the wings, you can probably use just two sheets to cover them if the covering you have is big enough. You'll probably go for a 1/4" to 1/2" overlap. On the wings, that overlap is on the front edge with the sheet starting on the bottom leading edge, wrapping at the trailing edge and going back to the front leading edge. Tack that front leading edge all of the way down and then start the shrinking of the rest of it. Shrink it evenly so you don't warp the wing. The dihedral of the two wing halves will also have an overlap... which side is on top shouldn't matter. The rounded wing tips will be a fun chore, so take your time with those as well.

At this point... I think I'm just going to link you to an older post on another forum that has pics of what that person did. A pic is worth a thousand words and these are done very well... since I can't give you pics... I can at least link you to someone that did... see Fokker Dr.1 Jtechlaser - Page 2 - RC Groups

While I'm at it... here are two pics of the second airplane I had built ( but never flew ) back in the mid 70's... which reminds me of another tip. Trim tape, can cover a lot of crooked cuts... lol

Kobra_Top_2011-06-30_On1_wm.jpg


Kobra_Bottom_2011-06-30_On1_wm.jpg
 

exctmt

New Member
It has been ages since I scratch built or built from kits. So I'll try to remember the things I did as best as I can.

First, long before you reach the point of covering. Your surface, if not perfect... will show every flaw once you cover it. Covering will not hide anything you didn't prep properly. It's much like painting only you are using a plastic sheet instead. So fill all cracks and sand everything to a perfectly smooth surface just as you would anything you were going to paint.

Next thing when you do start using an iron or heat gun... forget about the numbers except to get you started. Irons are not perfect, no matter what temps they may show they have ... and different brand films, for that matter same brand but different year makes will differ. Each brand will have what temps they recommend... so start there but get a scrap piece of balsa and film and test it yourself. Ignore the numbers on the iron... let the results guide you.

You will want to find two temps that work with the iron and film you are using. You want a tacking ( lower ) temp to start with and a temp that works well for shrinking ( higher ) the film. Using the sock with the iron will of course require a slightly higher temp... but it also helps keep you from scratching the film. Personally, I preferred to tack with an iron and use a heat gun to shrink with.

Plan out your covering with as few sheets as possible. You will tack all of the edges you are working with first before you move onto the shrinking of whatever piece you are working on.
For instance on the wings, you can probably use just two sheets to cover them if the covering you have is big enough. You'll probably go for a 1/4" to 1/2" overlap. On the wings, that overlap is on the front edge with the sheet starting on the bottom leading edge, wrapping at the trailing edge and going back to the front leading edge. Tack that front leading edge all of the way down and then start the shrinking of the rest of it. Shrink it evenly so you don't warp the wing. The dihedral of the two wing halves will also have an overlap... which side is on top shouldn't matter. The rounded wing tips will be a fun chore, so take your time with those as well.

At this point... I think I'm just going to link you to an older post on another forum that has pics of what that person did. A pic is worth a thousand words and these are done very well... since I can't give you pics... I can at least link you to someone that did... see Fokker Dr.1 Jtechlaser - Page 2 - RC Groups

While I'm at it... here are two pics of the second airplane I had built ( but never flew ) back in the mid 70's... which reminds me of another tip. Trim tape, can cover a lot of crooked cuts... lol

Kobra_Top_2011-06-30_On1_wm.jpg


Kobra_Bottom_2011-06-30_On1_wm.jpg
I took your advice and bought a heat gun. That is definitely the way to go! Much easier to shrink the film and a better job. Thanks again.
 
Top Bottom