Hi everyone, as you can see Fran along with me were pulling our hairs out to make this work

. I thank him most sincerely for the countless hours he put in to help me.

In dreaming of building a 450 size SiKorsky Sky Crane Helicopter has always been a thought of mine. In the army doing the Vietnam war was trained to work on these beast. But the army in it's wisdom decided my skills were needed else where when I arrived in country. So I was reassign to an assault helicopter unit with the 1st Cavalry Division. Fran's picture of a Huey helicopter is what drew me in meeting him. That's the type of bird we flew in

. That's why about a year ago I drew a rough picture of a Sky Crane that turn into a scale size blue print. Now that was the easy part, once done I made templates out of cardboard again to scale based on the blueprints. Trace these on 1/32" plywood sheet. Then formed the frame of the heli using 1/8" pine wood strips. Everything was secured with carpenter glue and allowed to cure over night. I also used everyday items you have at home. For instance a paper clip makes an awesome tail skid and those wooden sticks you get from a paint department at Home Depot or Lowes were cut and used to brace the main frame to the fuselage thus stopping any vibrations. All body tops are screwed in place to the fuselage. The twin turbines were made out of toilet paper rolls and milk carton caps for the fan intakes using wooden plugs for the center cones. And can't forget about the cardboard box used for the water tank. The hose was made out of a clothes line wrapped in a twine and coated with a contact cement. During the process I wrote and took photos that you can find on the following dates in the Forum: 8/13 & 28; 9/3,5,9,11,13,&16; 19/13,23 ,& 29; 11/17 & 29; 1/15 & 20; 3/9 to present. Had to make several changes to get the right form I was looking for. Spent countless hours researching on the internet looking at different birds. I was

totally wrong thinking this would be a walk in the park. Made so many changes and modifications lost count. The biggest headache was after putting the main frame with 325mm blades in the fuselage. And then it happen! the main blades and tail rotor blades touch and overlap by at least 1/2". Due to the length and weight of Hulk Jr. 6 lbs. (knew I should have put that boy on a diet), smaller blades were out of the question. That's when I asked for help from members of the forum and buel williams (love you brother) came to the rescue. He sent me a 470 size belt that allowed me to extend the tail end of the fuselage by 4". With the 45 degree transfer box towards the tail rotor assembly a perfect fit. I then added 360mm blades and was back in the game. Hulk Jr. power system consist of a 3700KV motor, (2) 3 cell 2200mah 50c lipo batteries, & 40amp ESC. The only store bought item were (6) rubber wheels for the landing gear. Rackman got me some super strong hollow wooden tubes that hold both the metal springs fran got me and wheel assembly that holds 2 tires each. These springs are not only light but strong enough to absorb the shock of a landing. They worked perfectly, THANK YOU GUYS

. Once everything was in place, created a folder to store the history of Hulk Jr. That's when I took out the main frame and handed it over to fran for the mechanical setup with the FBL unit. As I was painting the fuselage my son in law Carey whose a wiz on the computer custom made the decals for me. That's his work you see in the photos

. Next project on my to do list was to detail the cockpit interior for both the front and the bubble that faces the rear. I build the console that included painted on instruments, seats with a harness for all crew members, collective and cyclic sticks and foot pedals. You have to look closely to see them but that's part of the fun

. And making the windows was time consuming in itself. Had to do that over twice

. And to fast forward today can give you a decent idea of the mini barriers we over came in this build. Again a big thank you for all the support received from everyone who helped make this dream come true. Best regards, Jim P.S. would I do it again...... I don't think so

 . Once completed with successful test flights, fran11784 and I will co-author an in depth thread. I'll cover the making of the fuselage and fran11784 will discuss the mechanics of setting up the FBL system. Still have to install the navigation lights. As for the test flights, we'll take our time to ensure Hulk Jr. has a good maiden flight. Best regards, Jim
 . Once completed with successful test flights, fran11784 and I will co-author an in depth thread. I'll cover the making of the fuselage and fran11784 will discuss the mechanics of setting up the FBL system. Still have to install the navigation lights. As for the test flights, we'll take our time to ensure Hulk Jr. has a good maiden flight. Best regards, Jim
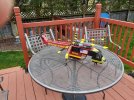
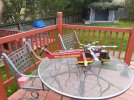
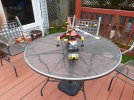
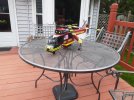
 Thanks for sharing and now the maiden


 . I have never worked on anything smaller then a 500-size model and now I know why...lmao. Cheers folks!
 . I thank him most sincerely for the countless hours he put in to help me.
  . That's why about a year ago I drew a rough picture of a Sky Crane that turn into a scale size blue print. Now that was the easy part, once done I made templates out of cardboard again to scale based on the blueprints. Trace these on 1/32" plywood sheet. Then formed the frame of the heli using 1/8" pine wood strips. Everything was secured with carpenter glue and allowed to cure over night. I also used everyday items you have at home. For instance a paper clip makes an awesome tail skid and those wooden sticks you get from a paint department at Home Depot or Lowes were cut and used to brace the main frame to the fuselage thus stopping any vibrations. All body tops are screwed in place to the fuselage. The twin turbines were made out of toilet paper rolls and milk carton caps for the fan intakes using wooden plugs for the center cones. And can't forget about the cardboard box used for the water tank. The hose was made out of a clothes line wrapped in a twine and coated with a contact cement. During the process I wrote and took photos that you can find on the following dates in the Forum: 8/13 & 28; 9/3,5,9,11,13,&16; 19/13,23 ,& 29; 11/17 & 29; 1/15 & 20; 3/9 to present. Had to make several changes to get the right form I was looking for. Spent countless hours researching on the internet looking at different birds. I was
  totally wrong thinking this would be a walk in the park. Made so many changes and modifications lost count. The biggest headache was after putting the main frame with 325mm blades in the fuselage. And then it happen! the main blades and tail rotor blades touch and overlap by at least 1/2". Due to the length and weight of Hulk Jr. 6 lbs. (knew I should have put that boy on a diet), smaller blades were out of the question. That's when I asked for help from members of the forum and buel williams (love you brother) came to the rescue. He sent me a 470 size belt that allowed me to extend the tail end of the fuselage by 4". With the 45 degree transfer box towards the tail rotor assembly a perfect fit. I then added 360mm blades and was back in the game. Hulk Jr. power system consist of a 3700KV motor, (2) 3 cell 2200mah 50c lipo batteries, & 40amp ESC. The only store bought item were (6) rubber wheels for the landing gear. Rackman got me some super strong hollow wooden tubes that hold both the metal springs fran got me and wheel assembly that holds 2 tires each. These springs are not only light but strong enough to absorb the shock of a landing. They worked perfectly, THANK YOU GUYS
  . And making the windows was time consuming in itself. Had to do that over twice
 . And to fast forward today can give you a decent idea of the mini barriers we over came in this build. Again a big thank you for all the support received from everyone who helped make this dream come true. Best regards, Jim P.S. would I do it again...... I don't think so


 . We know first have to do the pod/boom bit, but also reconfigure the weight distribution. The main frame sits in the midsection of the fuselage so there is added weight from the two batteries plus cab area. Then there is additional weight from the tail section of the fuselage. All this must be taken in account prior installing in the fuselage. That is why we'll think this thru carefully before any commitment thus ensuring all bases are covered. Once fully tested with fuselage, total flying weight should be 7 lbs given an ounce. or two
  ...Good luck!